Overview
Odoo's online Point of Sale application is based on a simple, user
friendly interface. The Point of Sale application can be used online or
offline on iPads, Android tablets or laptops.
Odoo Point of Sale is fully integrated with the Inventory and the
Accounting applications. Any transaction with your point of sale will
automatically be registered in your inventory management and accounting
and, even in your CRM as the customer can be identified from the app.
You will be able to run real time statistics and consolidations across
all your shops without the hassle of integrating several external
applications.
Install the Point of Sale Application
Start by installing the Point of Sale application. Go to
and install the Point of Sale application.
Do not forget to install an accounting chart of account. If it is not
done, go to the Invoicing/Accounting application and click on Browse
available countries:

Then choose the one you want to install.
When it is done, you are all set to use the point of sale.
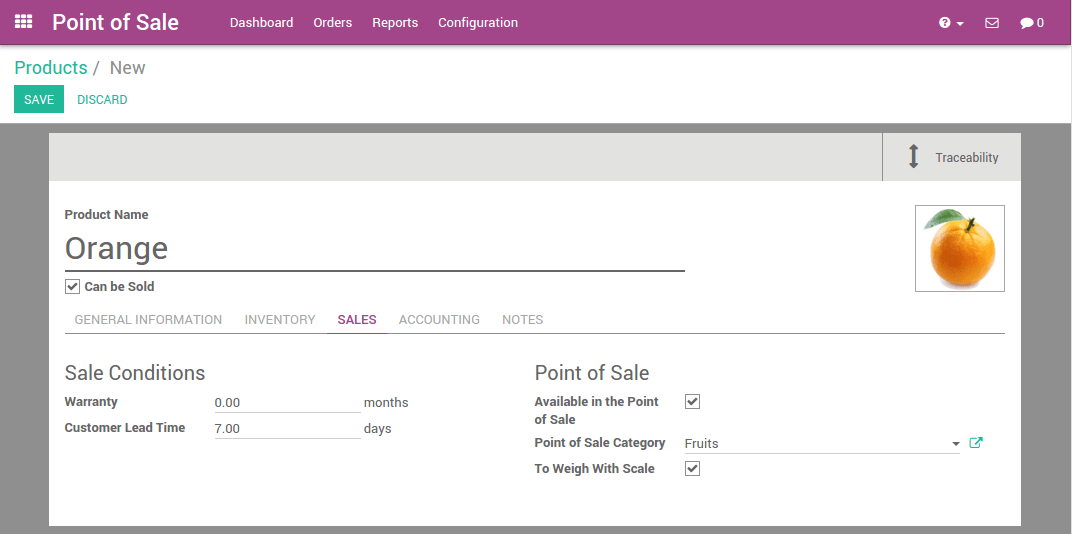
Adding Products
To add products from the point of sale Dashboard go to
and click on Create.
The first example will be oranges with a price of 3€/kg. In the Sales
tab, you can see the point of sale configuration. There, you can set a
product category, specify that the product has to be weighted or not and
ensure that it will be available in the point of sale.
In same the way, you can add lemons, pumpkins, red onions, bananas... in
the database.
Tip
How to easily manage categories?
If you already have a database with your products, you can easily set a
Point of Sale Category by using the Kanban view and by grouping the
products by Point of Sale Category.

Configuring a payment method
To configure a new payment method go to
and click on Create.
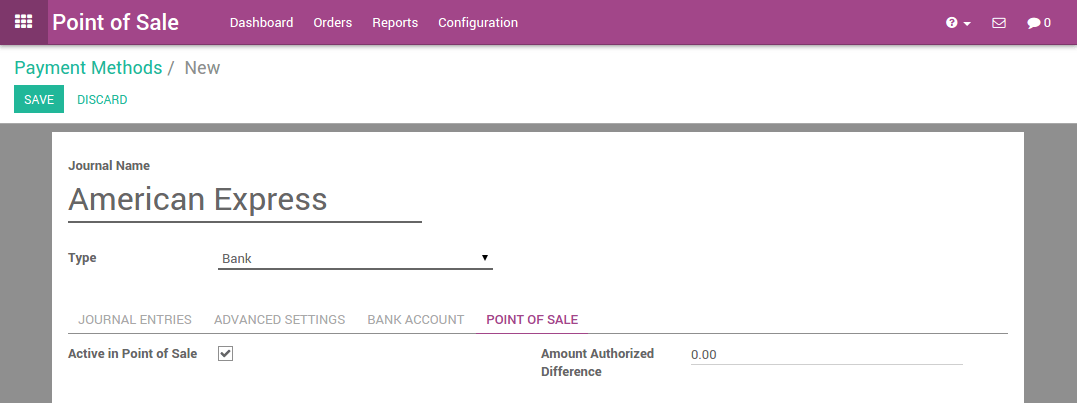
After you set up a name and the type of payment method, you can go to
the point of sale tab and ensure that this payment method has been
activated for the point of sale.
Configuring your points of sales
Go to ,
click on the main point of sale. Edit the point of sale
and add your custom payment method into the available payment methods.
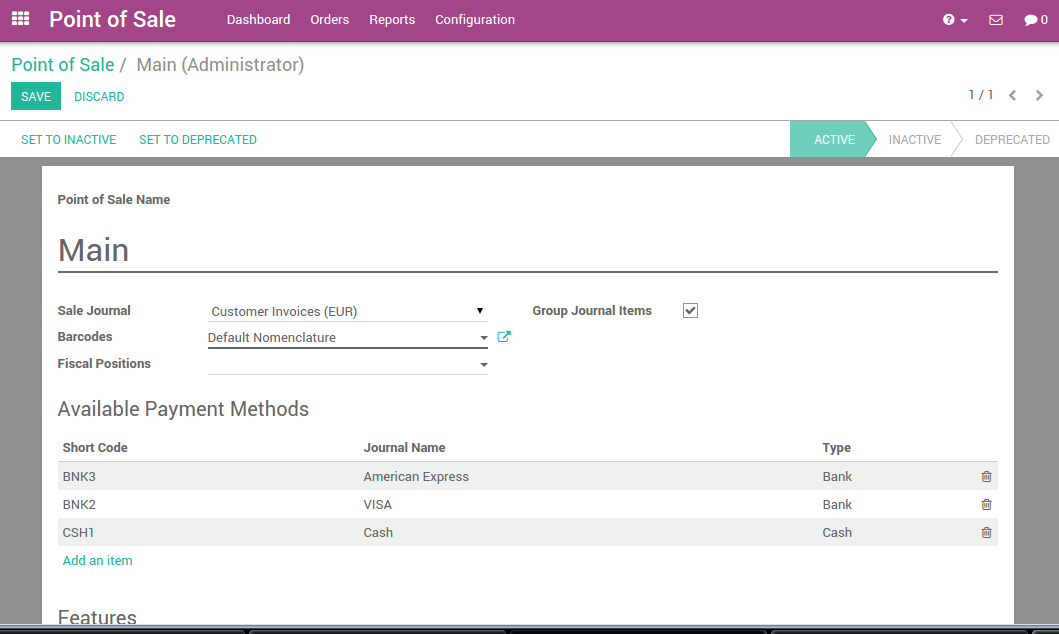
You can configure each point of sale according to your hardware,
location,...
Allowed Pricelists
This is a technical field used for the domain of pricelist_id.
Point of Sale
An internal identification of the point of sale.
Module Pos Hr
Show employee login screen
Employees with access
If left empty, all employees can log in to the PoS session
Restaurant Floors
The restaurant floors served by this point of sale.
Orderline Notes
Allow custom notes on Orderlines.
Display Category Pictures
The product categories will be displayed with pictures.
Available PoS Product Categories
The point of sale will only display products which are within one of the selected category trees. If no category is specified, all available products will be shown
Virtual KeyBoard
Don’t turn this option on if you take orders on smartphones or tablets.
Such devices already benefit from a native keyboard.
Initial Category
The point of sale will display this product category by default. If no category is specified, all available products will be shown.
Large Scrollbars
For imprecise industrial touchscreens.
IP Address
The hostname or ip address of the hardware proxy, Will be autodetected if left empty.
Scan via Proxy
Enable barcode scanning with a remotely connected barcode scanner.
Electronic Scale
Enables Electronic Scale integration.
Print via Proxy
Bypass browser printing and prints via the hardware proxy.
Cashdrawer
Automatically open the cashdrawer.
Customer Facing Display
Show checkout to customers with a remotely-connected screen.
Other Devices
Connect devices to your PoS without an IoT Box.
Epson Printer IP
Local IP address of an Epson receipt printer.
Barcode Nomenclature
Defines what kind of barcodes are available and how they are assigned to products, customers and cashiers.
Fiscal Positions
This is useful for restaurants with onsite and take-away services that imply specific tax rates.
Default Pricelist
The pricelist used if no customer is selected or if the customer has no Sale Pricelist configured.
Available Pricelists
Make several pricelists available in the Point of Sale. You can also apply a pricelist to specific customers from their contact form (in Sales tab). To be valid, this pricelist must be listed here as an available pricelist. Otherwise the default pricelist will apply.
Restrict Price Modifications to Managers
Only users with Manager access rights for PoS app can modify the product prices on orders.
Cash Control
Check the amount of the cashbox at opening and closing.
Amount Authorized Difference
This field depicts the maximum difference allowed between the ending balance and the theoretical cash when closing a session, for non-POS managers. If this maximum is reached, the user will have an error message at the closing of his session saying that he needs to contact his manager.
Prefill Cash Payment
The payment input will behave similarily to bank payment input, and will be prefilled with the exact due amount.
Tip Product
This product is used as reference on customer receipts.
Order IDs Sequence
This sequence is automatically created by Odoo but you can change it to customize the reference numbers of your orders.
Receipt Header
A short text that will be inserted as a header in the printed receipt.
Receipt Footer
A short text that will be inserted as a footer in the printed receipt.
Automatic Receipt Printing
The receipt will automatically be printed at the end of each order.
Skip Preview Screen
The receipt screen will be skipped if the receipt can be printed automatically.
Bill Printing
Allows to print the Bill before payment.
Bill Splitting
Enables Bill Splitting in the Point of Sale.
Invoicing
Enables invoice generation from the Point of Sale.
Invoice Journal
Accounting journal used to create invoices.
Sales Journal
Accounting journal used to post sales entries.
Sales Team
This Point of sale's sales will be related to this Sales Team.
Now you are ready to make your first steps with your point of sale.
First Steps in the Point of Sale
Your first order
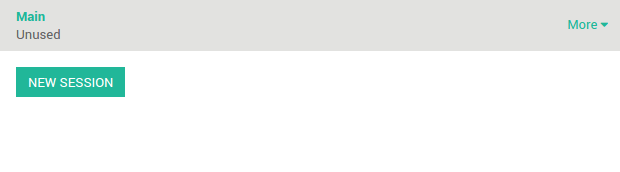
On the dashboard, you can see your points of sales, click on New
session:
You will get the main point of sale interface:
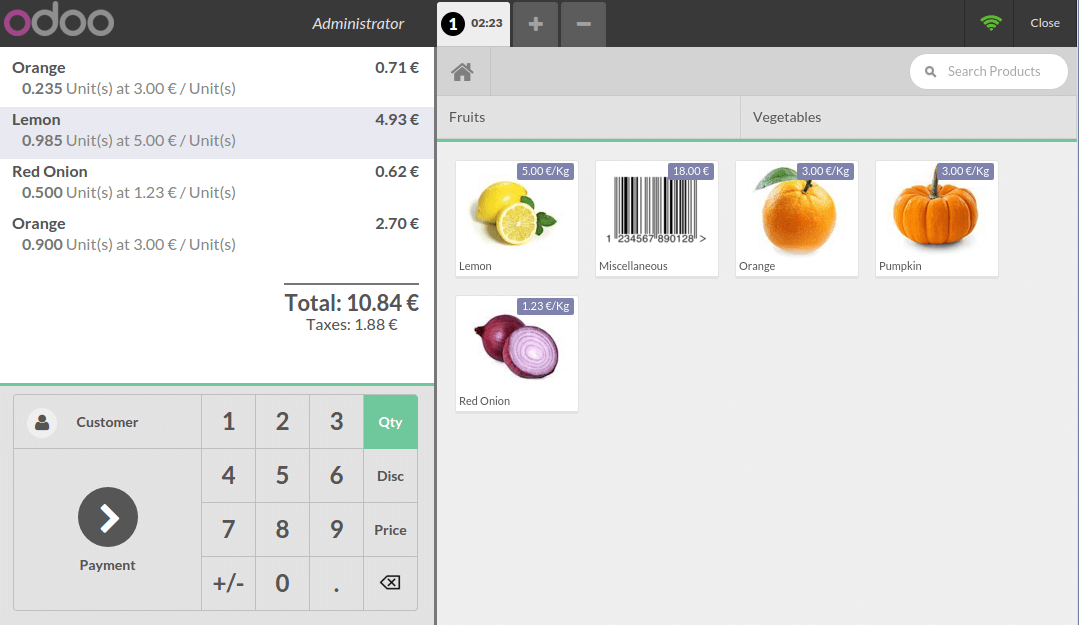
On the right you can see the products list with the categories
on the top. If you click on a product, it will be added in the cart. You
can directly set the correct quantity or weight by typing it on the
keyboard.
Payment
Once the order is completed, click on Payment. You can choose the
customer payment method. In this example, the customer owes you 10.84 €
and pays with a 20 € note. When it's done, click on Validate.
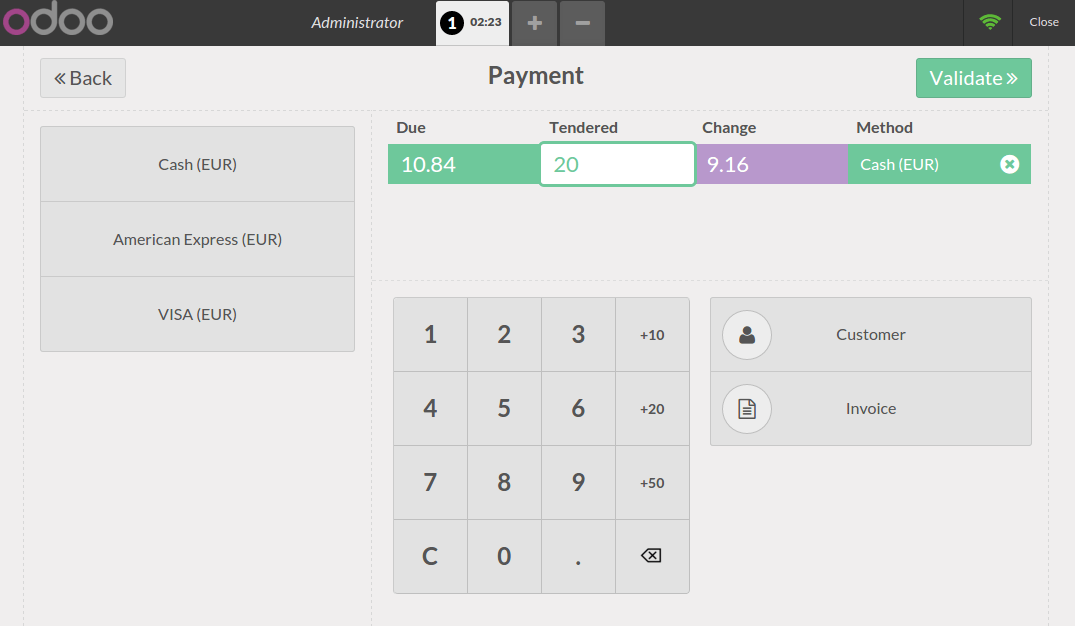
Your ticket is printed and you are now ready to make your second order.
Closing a session
At the end of the day, to close the session, click on the Close button
on the top right. Click again on the close button of the point of sale.
On this page, you will see a summary of the transactions
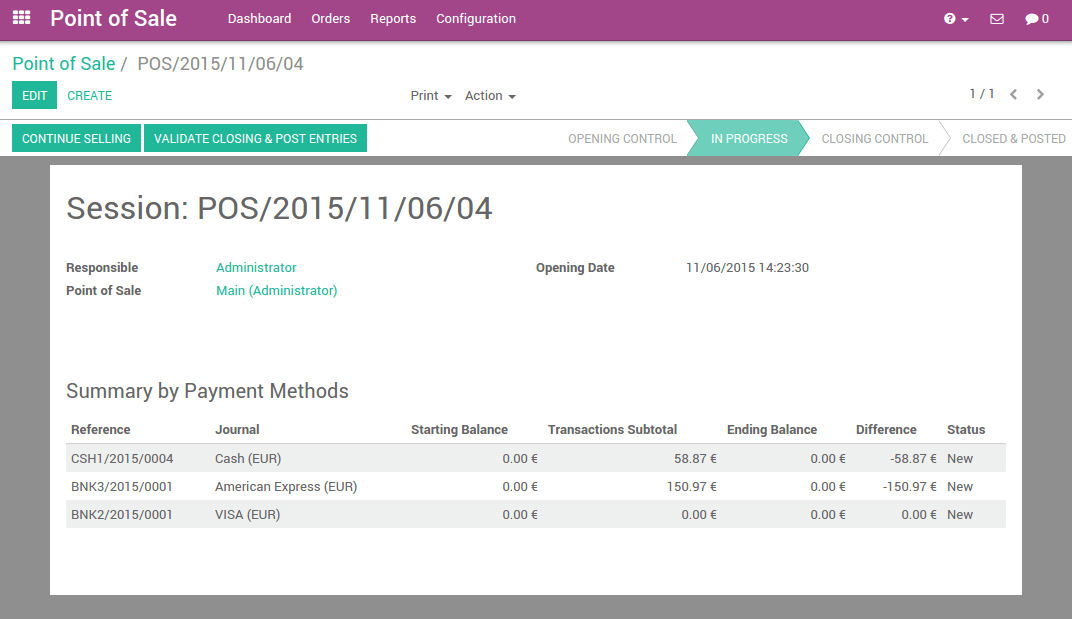
If you click on a payment method line, the journal of this method
appears containing all the transactions performed.

Now, you only have to validate and close the session.